
View Project or Customer Profitability in Zoho Books
- Apr 24, 2017
- 2 min read
As a growing business, you would have a rapidly expanding customer base spread across several domains and locations. It becomes confusing when you generate a report, as it fetches information about all the customers. Zoho Books allows you to generate filtered reports based on short keywords called Reporting Tags.
You can create and associate Reporting Tags with transactions created in Zoho Books. Once you associate the tag(s) with multiple transactions over a period of time, it will be easy for you to generate reports for transactions based on the particular tag(s).
Let us consider an example where you have a lot of business coming from different car rental companies. Whenever you create an invoice for such companies, you can associate a tag say, ‘Car Rental’ to it. Later on, if you’d like to look up transactions made for car rental companies, all you have to do is generate a financial report based on the tag ‘Car Rental’. You can also go one step further to see your payables and receivables based on say, your Region. You could add location tags such as New York, Texas, California, etc., to see transactions that have been created for customers in these regions.
Create a Reporting Tag
To create a reporting tag, click on the Gear icon on the top right corner of your Zoho Books screen.
Navigate to More Setting -> Reporting Tags and click on the + New Tag button.
In the pop-up that follows, enter the Tag Name.
Under Options, you may enter the names of different cities, departments, categories etc. based on your requirement.

Click on Save to save the tag.
Associate a Tag with a Transaction
You can associate tags with Sales and Purchases transactions such as invoices an expenses. For example, while creating an invoice:
Click on the small ‘Circle’ icon on the New Invoice screen next to the Item Amount column.

Clicking on the icon will bring the Additional information pop-up where you can associate the tags you wish to for this transaction.
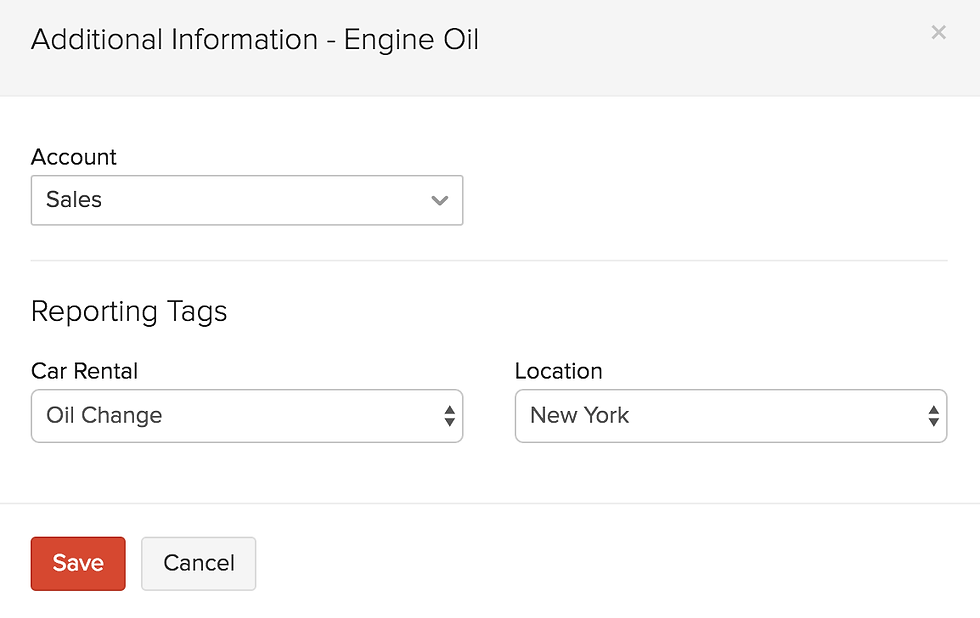
Click on Save to finish.
Associate a Tag with a Contact or Item
You can associate Reporting tags with a Contact or an Item and it will automatically get added to the invoice when the particular customer or the item is included in the invoice.
Associate a tag for a contact:
While creating/editing contacts, scroll down, select the Reporting Tags tab and choose one of the options for the reporting tags that you had created earlier.

Associate a tag for an item:

You can associate a tag while adding or editing an item in the Item Details screen.
Generate Reports
One of the most useful features of having reporting tags is the option to generate Business Overview reports including Profit and Loss, Cash Flow Statement and Balance Sheet based on the tags that have been created and associated to transactions.
Navigate to the Reports module and select one of the reports under the Business Overview section.
Select the Customize Report option under the search bar.
You will see that the reporting tags that you have created are listed here. Select one of the options from the drop-down for each of these reporting tags.

Finally, click on Run Report to generate a report based on the criteria you’ve set.


Professional surveying courses ensure that projects are delivered efficiently and within budget. Their work supports decision-making through accurate reporting and analysis. It is a great way to gain relevant industry skills. The College of Contract Management Introduction to Project Controls is an accessible option to begin your training.
The post also emphasizes the importance of properly associating transactions with projects throughout the workflow—such as during invoicing or expense entry—so that profitability data remains accurate and meaningful. This helps businesses understand real project margins rather than just overall company performance.
In a broader analytical sense, this topic connects to 3.1 Analyse factors that influence the capacity of an individual to express consent, particularly in how clarity of information, structured presentation of data, user understanding, and system design can influence how individuals interpret financial reports and make informed decisions based on them.
This was an interesting and meaningful read. I liked how the author turned simple ideas into valuable insights that readers can connect with. Content like this inspires students to stay curious and continue improving their knowledge. Many learners also explore Online EViews Assignment Help through New Assignment Help UK when dealing with research projects, economic analysis, and quantitative assignments.
The article’s explanation of viewing project profitability in Zoho Books really stands out, especially the way it connects tracking individual project costs and revenue to a clearer overall understanding of business performance. It makes the whole process feel less abstract and more about actually seeing where time and resources are going in real terms.
It also made me think about how important visibility is when managing multiple projects, because without structured tracking it’s easy to lose sight of what’s actually profitable versus what just feels busy. I wonder how many small businesses actively use this kind of detailed breakdown versus relying on general accounting summaries. In a broader sense, it reflects how structured systems help people make better decisions in…
This blog is simple and practical as it explains how to view project profitability in Zoho Books, making it easier for businesses to understand where they are making money and where costs are going. It focuses on using clear data to track projects and make better financial decisions, which can really help with day-to-day business management. In the same way, students who need help with structuring and managing their academic work sometimes look for dissertation writing services in London to make their research and writing process more organised and clear.